
Introduction
FenestraPro is a façade design tool that identifies energy-saving strategies, reduces project cost, and improves building resiliency. Used in Revit workflows, FenestraPro automatically selects optimal glazing types per facade from our database of over 1000+ IGUs. Users can also compare and contrast glazing types to select the best option for thermal performance and project specifications. Our in-house BIM modelers have established a step by step workflow below to calculate glass to wall ratio.
Designers can calculate glass-to-wall ratio (or maximum allowable glazing) for any model based on the thermal performances for elements of the building envelope. As you set the thermal performances for element types (walls, floors, roofs and glazing), FenestraPro will automatically indicate the optimal glass-to-wall ratio for this configuration.
Understanding Maximum Glazing Percentages
FenestraPro will indicate both the current glazing percentage on the model and the maximum allowed according to the Building Code that you have input. The current glazing percentage may be set in two ways:
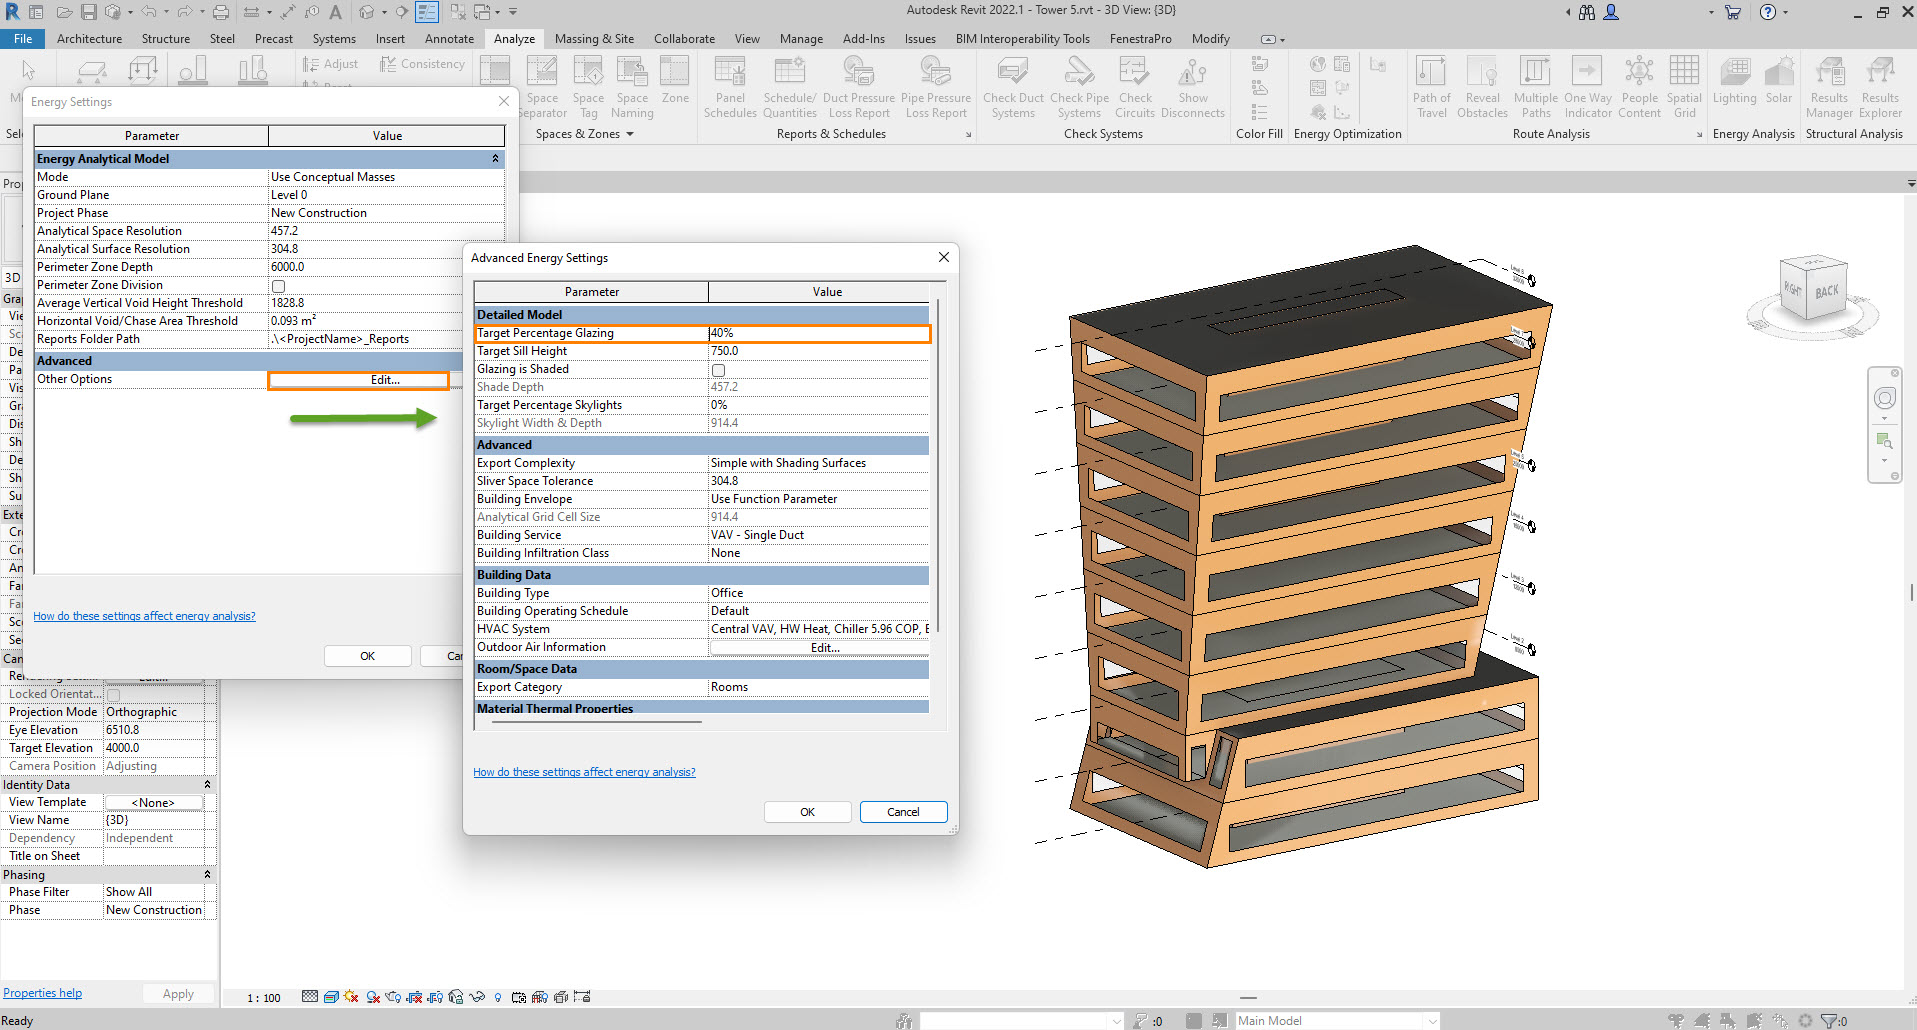
- Setting a value in Revit’s energy settings
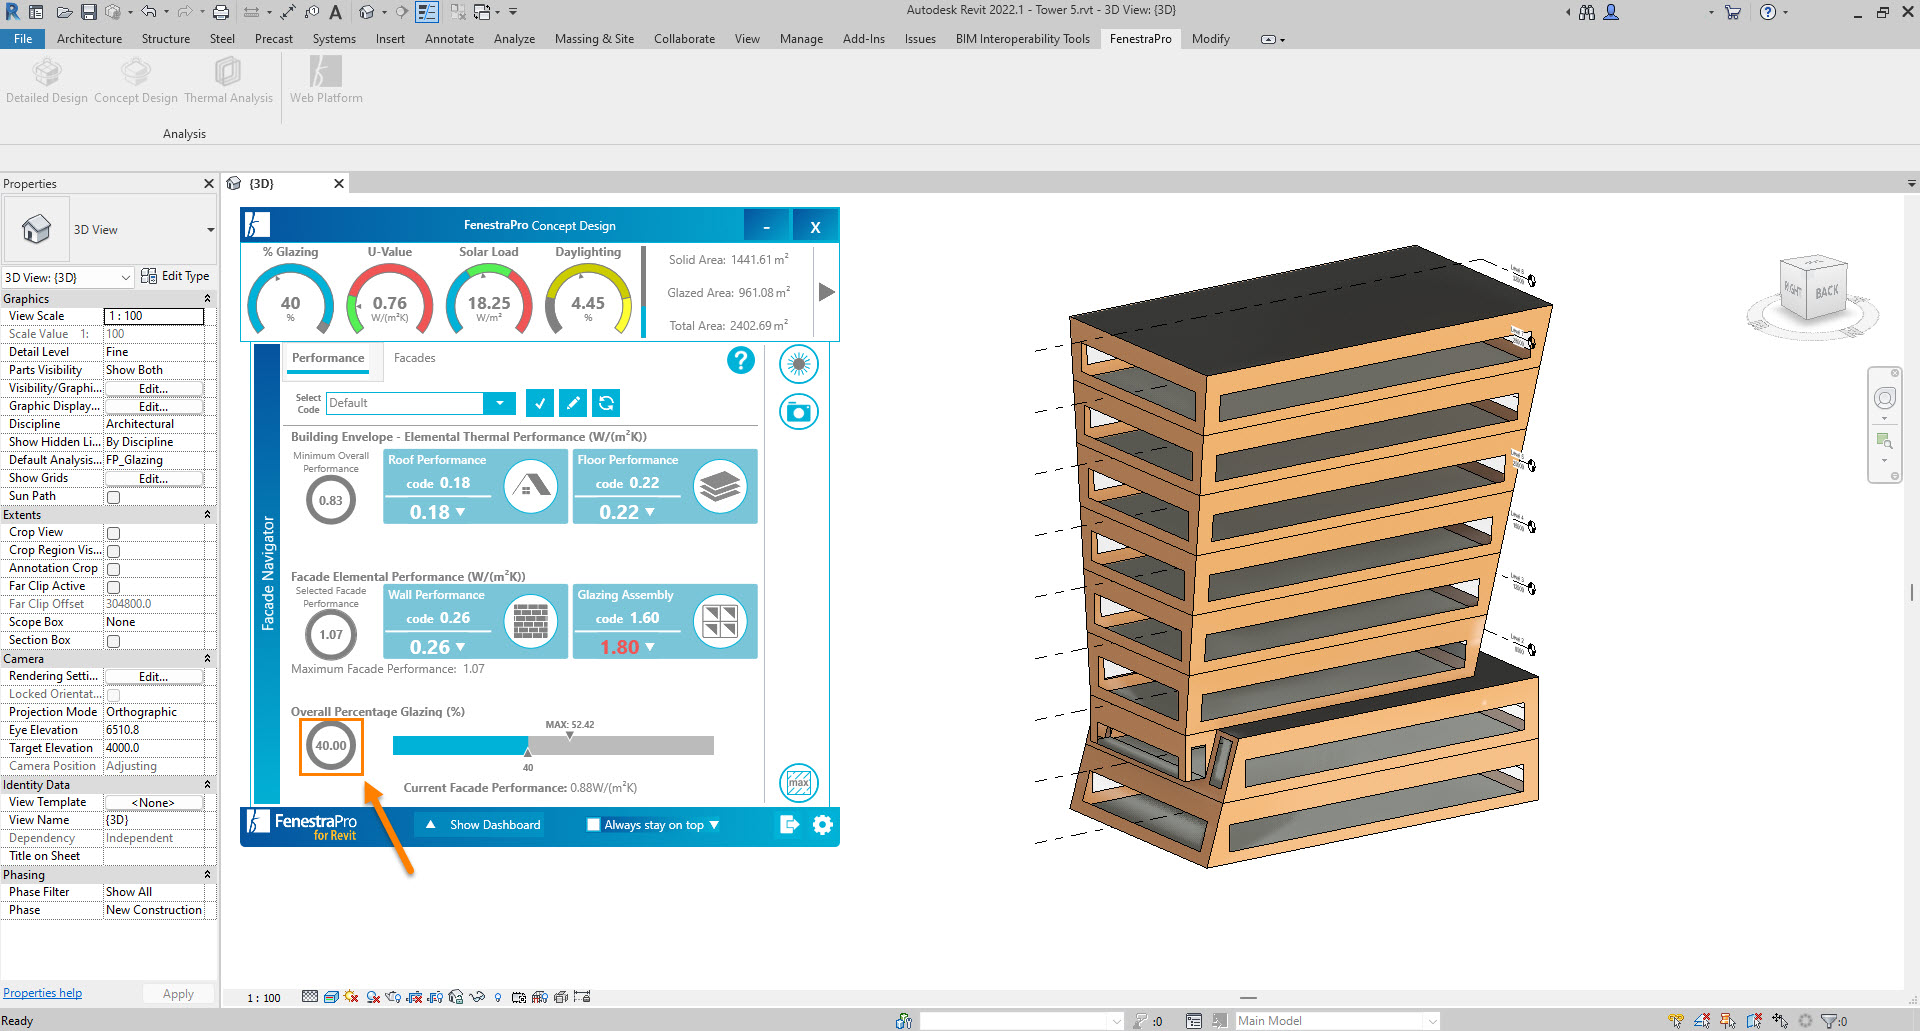
- Inputting a value for overall percentage of glazing


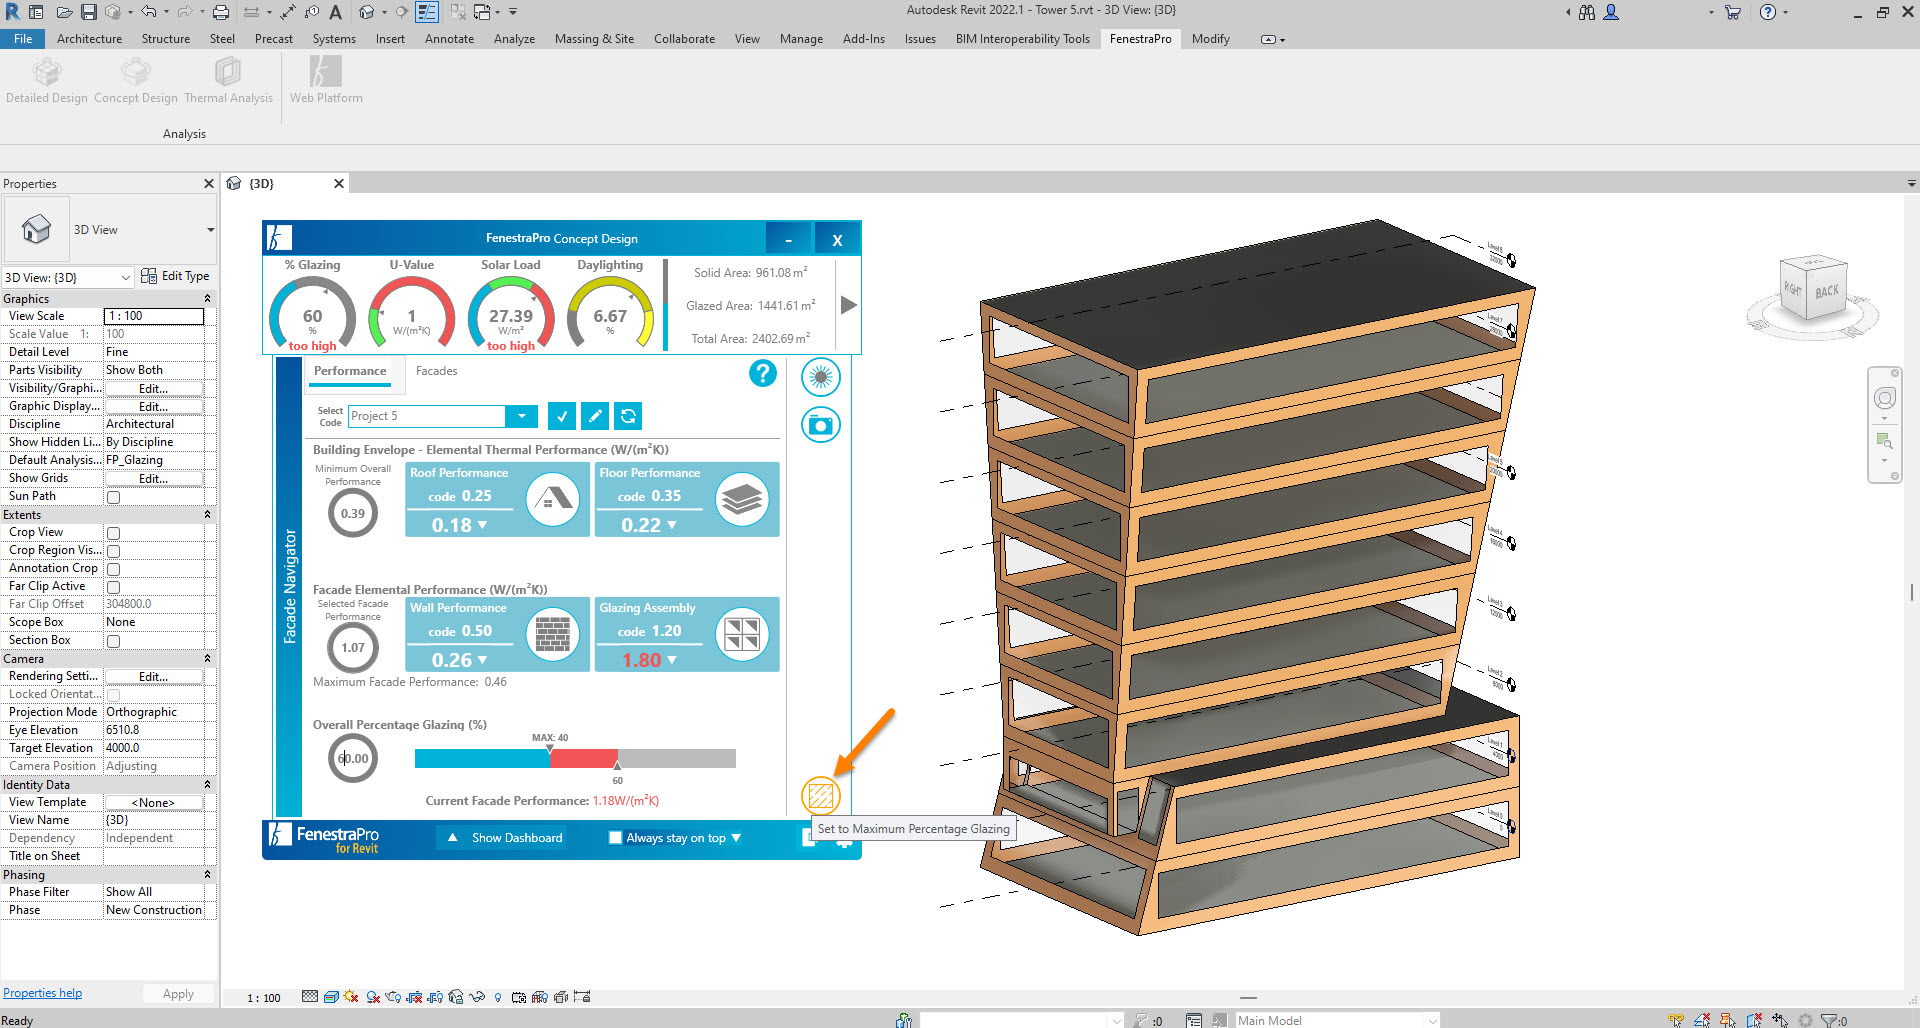
FenestraPro displays both the current glass-to-wall ratio and the maximum allowed under the selected energy code. If the maximum allowable glazing percentage is greater than the current glazing percentage on the model, you may adjust the glazing area on the conceptual model up to the allowable value or simply use the button provided to set all glazing to maximum percentage allowed.
You may increase or reduce the overall percentage value that will be applied to the entire model. Facades or surfaces can also be adjusted individually by inputting percentage values.


How To Define Glass-To-Wall Ratios
Step 1: Set an Overall Percentage Glazing Value
To set an overall percentage glazing value, type in a value in the Performance area. Click Return on the keyboard and this value will be applied to all areas on the project.
Step 2: Adjust Specific Facades and Surfaces
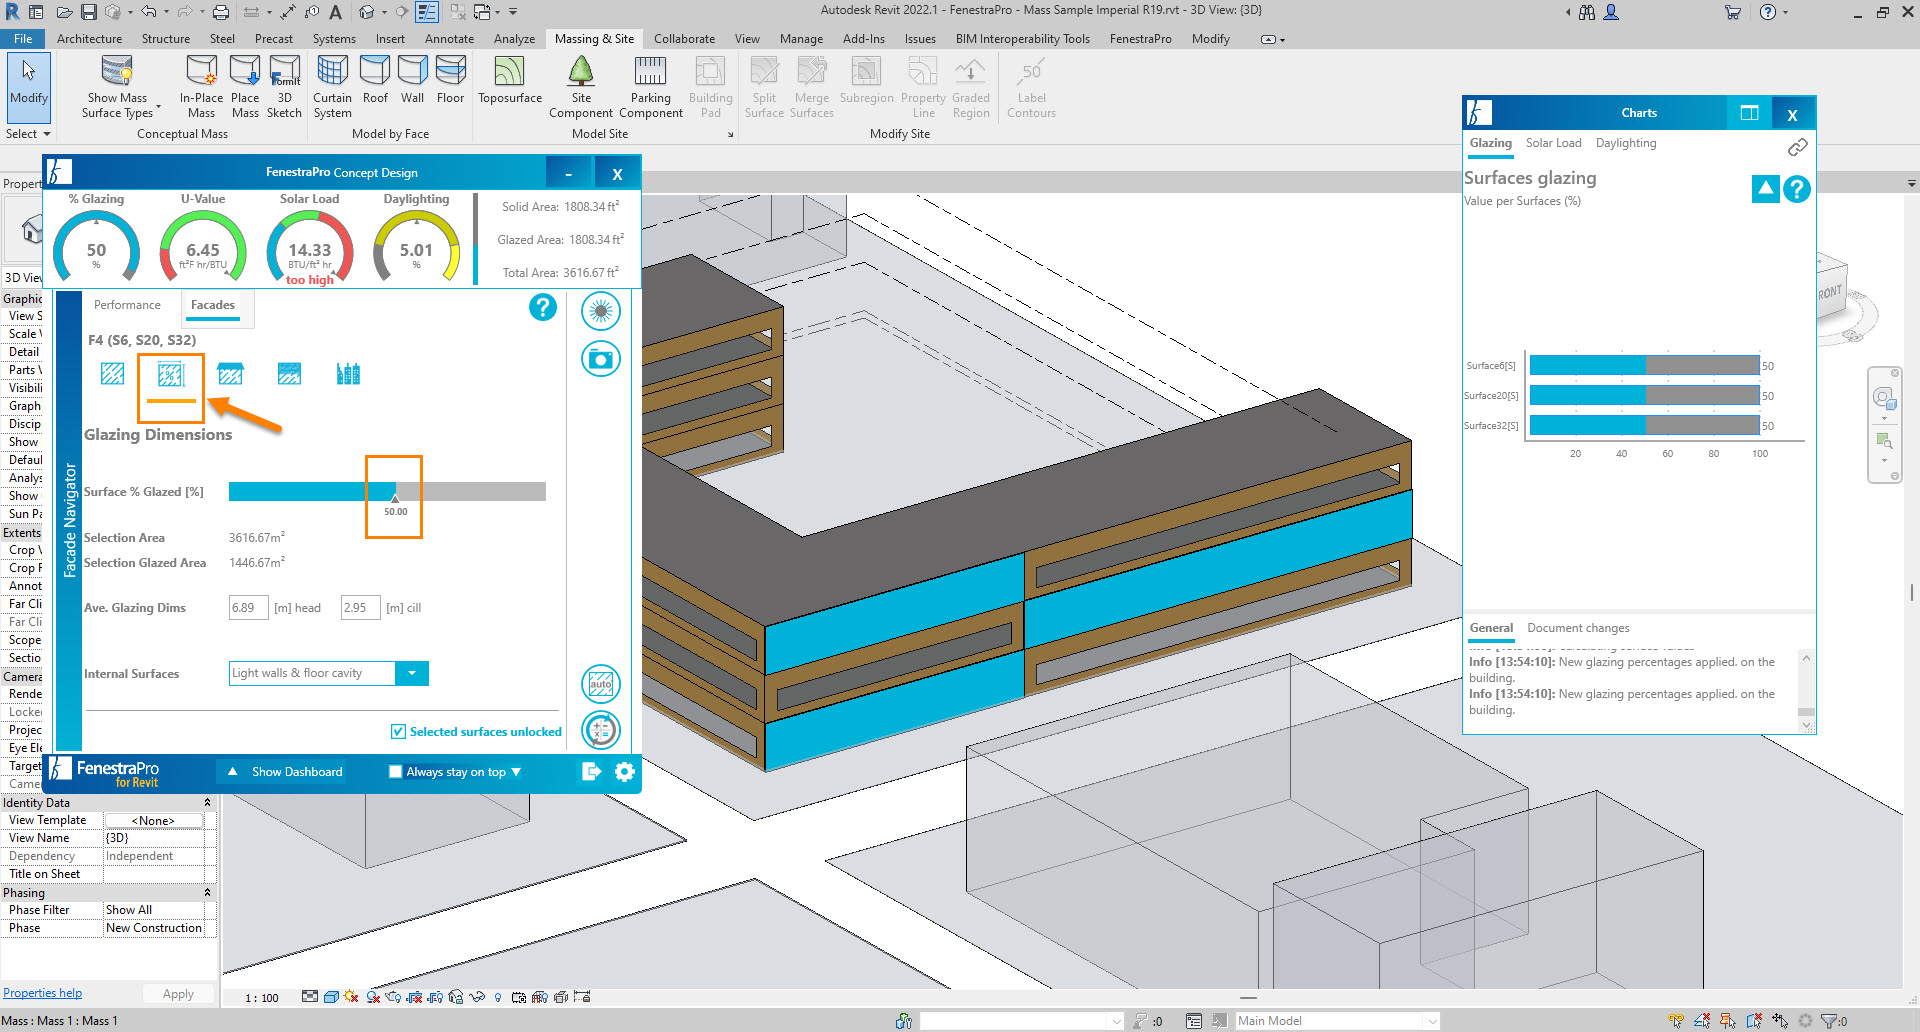
Next, select specific facades or surfaces in the Facade Navigator to define the glazing percentage of those areas. Click the Glazing Dimensions icon to define a value or adjust the slider to set a percentage.
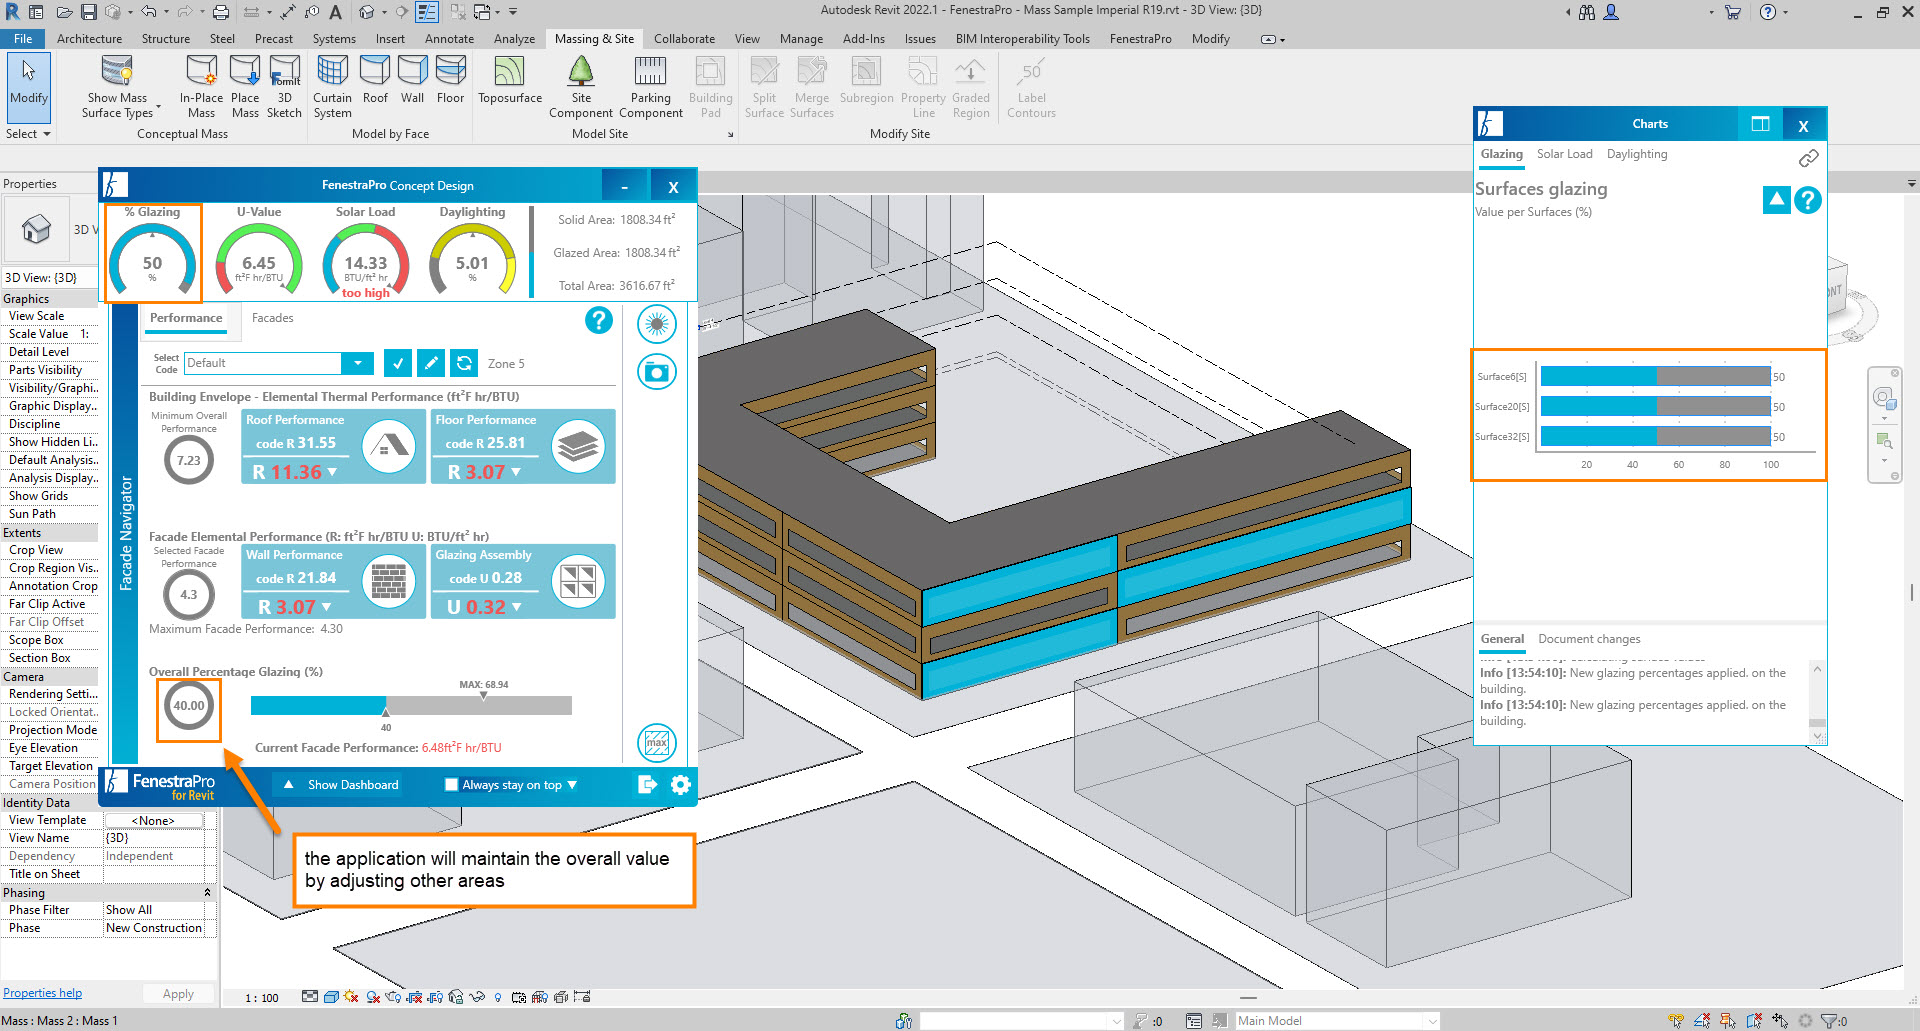
The application will always attempt to maintain the overall percentage that is set in the Overall Percentage Glazing setting. If you want to set a different percentage per individual facade or surface, then these will need to be locked to keep their settings.
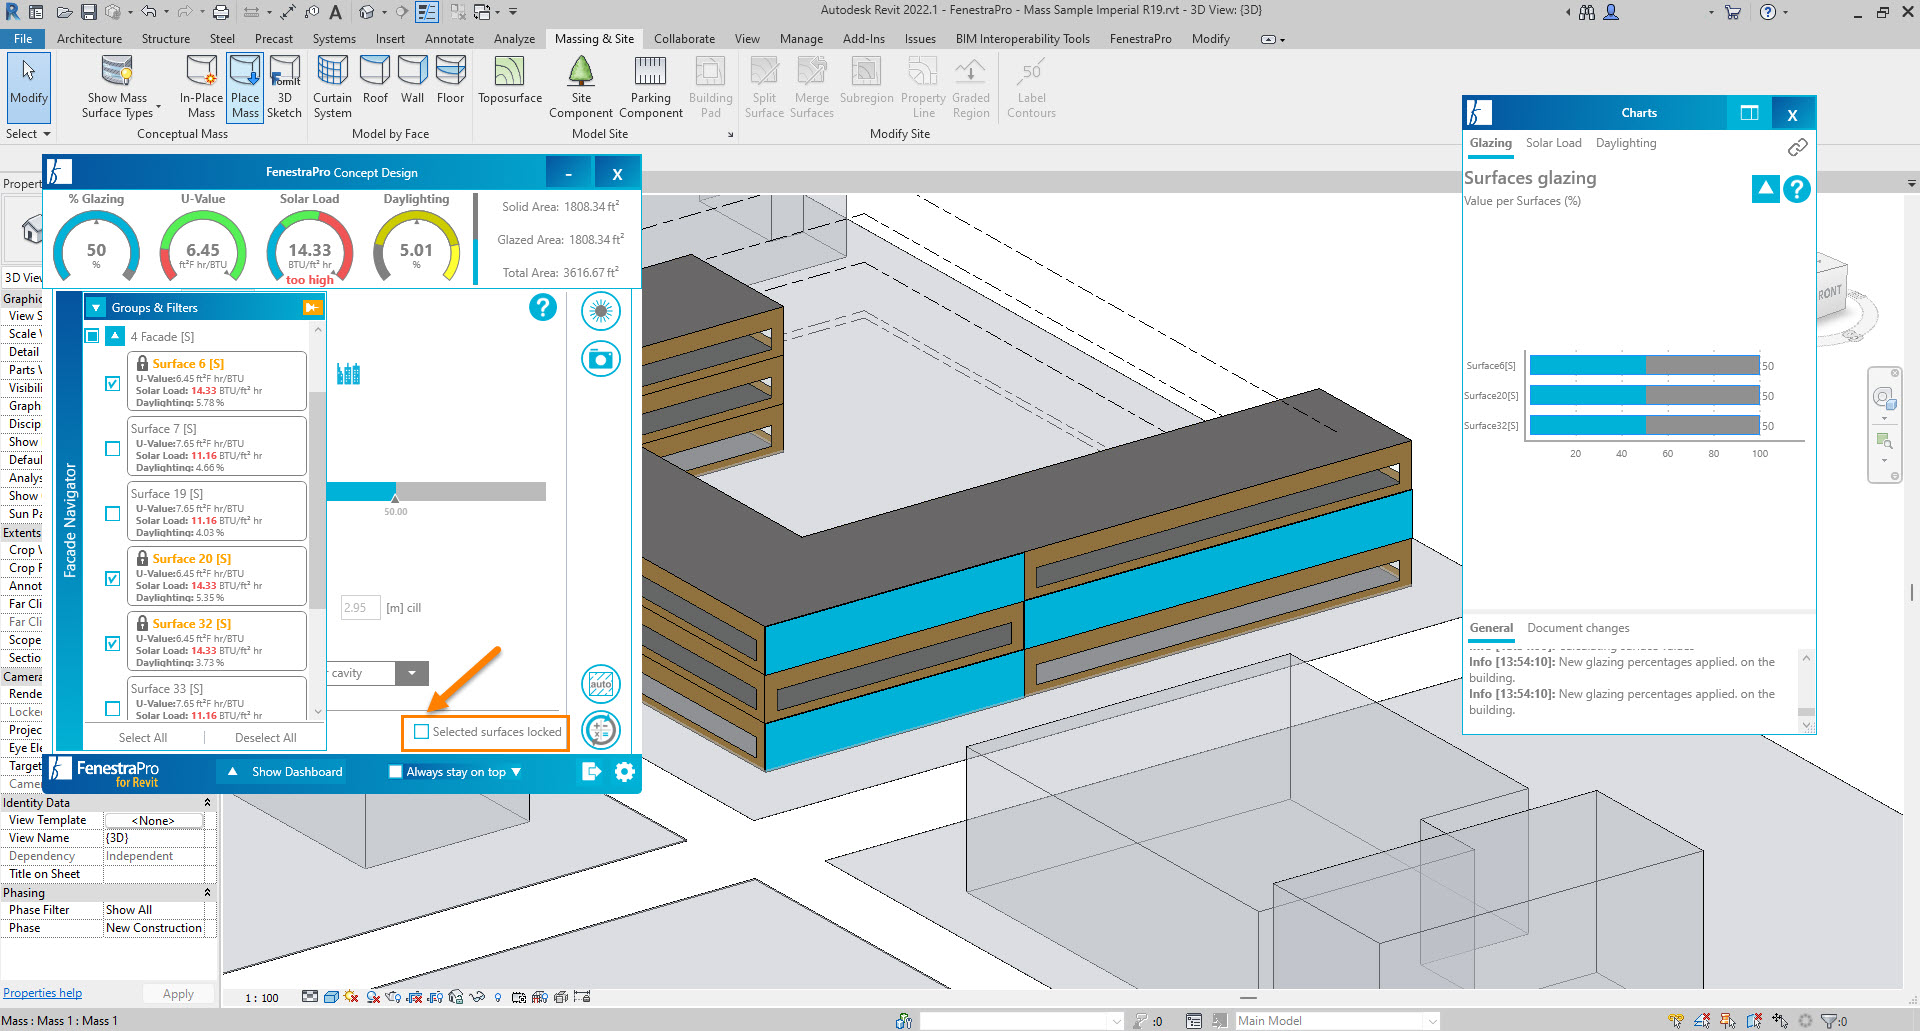
Step 3: Locking Your Facades Or Surfaces
Select the facade or surface and use the setting under the Facades tab to lock or unlock. The checkbox will confirm if the selected facade or surface is locked or unlocked.
Locking also maintains other settings on the locked Surfaces such as glazing specifications, shading canopies, fritting etc that has been applied. A padlock symbol will appear beside relevant Surfaces in the Façade Navigator as a reminder that these have been locked.
If you have modified enough glazing percentages on the surfaces, the overall value that has been set in the Performance Manager will automatically update. The image below shows that 3 surfaces have been selected and adjusted to 50%. The application will stay at the overall 40% of the project by adjusting the other surfaces. If you don’t want this, you can lock the other surfaces.
Step 4: Divide The Surfaces Into Separate Areas
To divide surfaces into separate areas, you may add edges in Revit by selecting the entire model and using the Edit-in-Place tool. Start by selecting the relevant surface and add an edge, or a vertical dividing line. The precise placement of this line may then be adjusted after it has been added by using an elevation view.

This is useful if you wish to have multiple ‘windows’ on a surface, rather than one larger glazed area applied. This action will create more independent surfaces that can be controlled separately.
Additionally, you can define and adjust the default sill and head heights for conceptual models under Settings in the application.
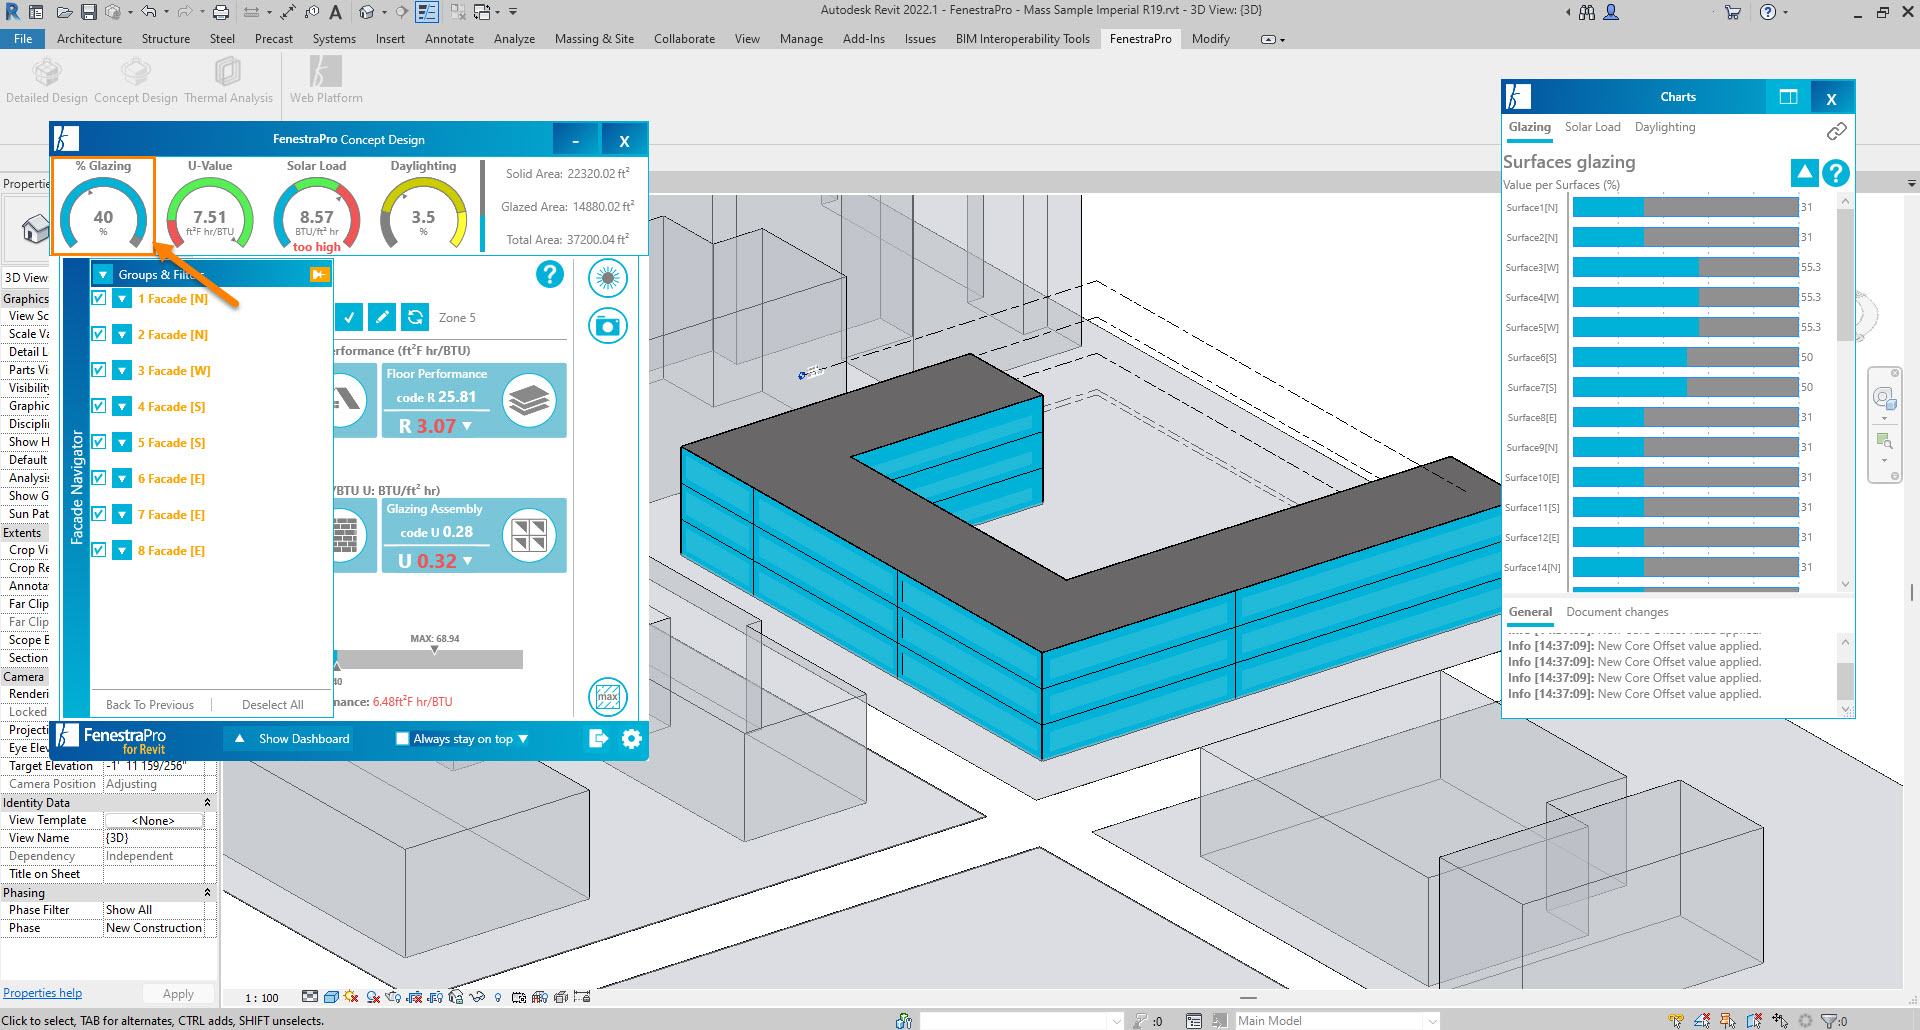
Step 5: Receiving sn Overall Glazed Percentage Value for the project
An Overall Glazed Percentage value for the project will display on the dashboard including all of the different glazing areas on the model. When no specific surfaces are selected, the overall value for the project is displayed. The Dashboard will display the average value when a specific or multiple surfaces and facades are selected.
Conclusion
Now that you have an overall glazing percentage value for your project, you can make better design decisions that will have a lasting effect on your building’s sustainabilty and resilience.
Our latest version of FenestraPro 7 has advanced energy modelling capabilities, including a simpler onboarding process, a user-friendly interface, and is faster to analyze as it works outside of Revit. To try FenestraPro 7 and receive an in-depth analysis on any design project, register for a free trial.