
Introduction
At FenestraPro, we provide sustainable design solutions that optimize the performance of the façade by optimizing both its geometry and its materials. Our latest feature goes one step further, allowing users to create a custom glass unit in 5 easy steps in the Guardian and Vitro Configurators and import them into Revit via FenestraPro.
Over time we have deepened the link between building designers and product manufacturers; particularly glass producers which can have such dramatic impacts on the passive performances of the facade. Our extensive database of products from Guardian Glass and Vitro Glass, as well as generic glass types, allow users to search, filter and compare glass products that are optimized for the performance within the space. When selected, a product can be applied to the Revit family to understand the impact on thermal, solar gains, and daylighting.
Here’s how it works:
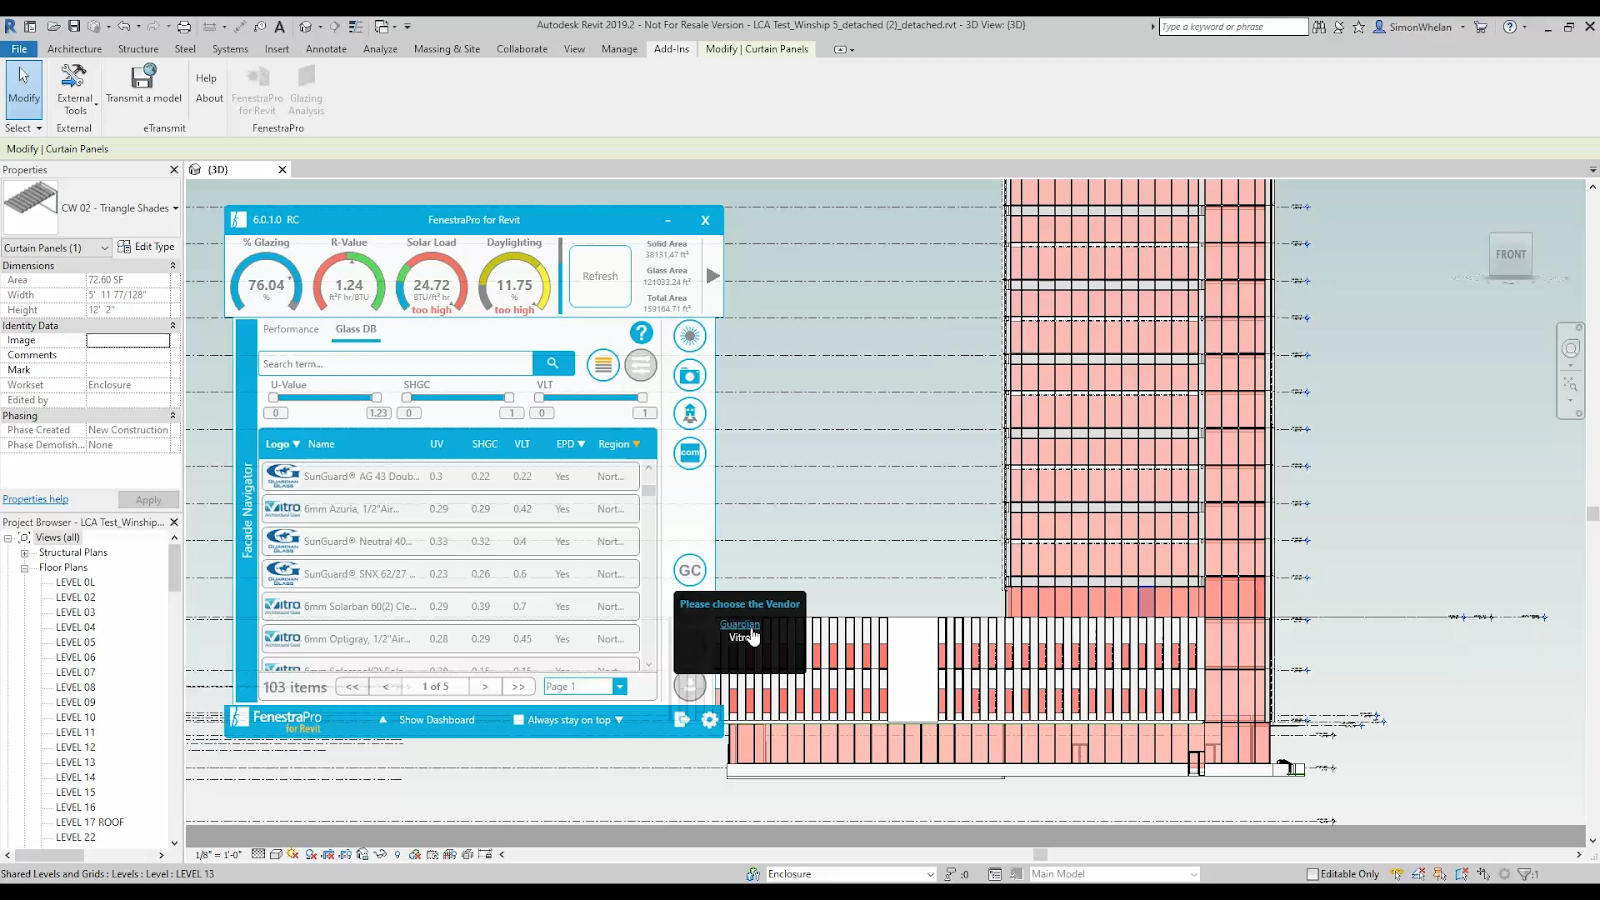
1. From FenestraPro, select the appropriate Glass configurator – Guardian Glass Analytics (shown here) or Vitro Construct IGU.
2. Create your custom IGU, with the appropriate glass thickness, gas fill, films, and coatings. You can download a report or PDF with the IGU properties from here.
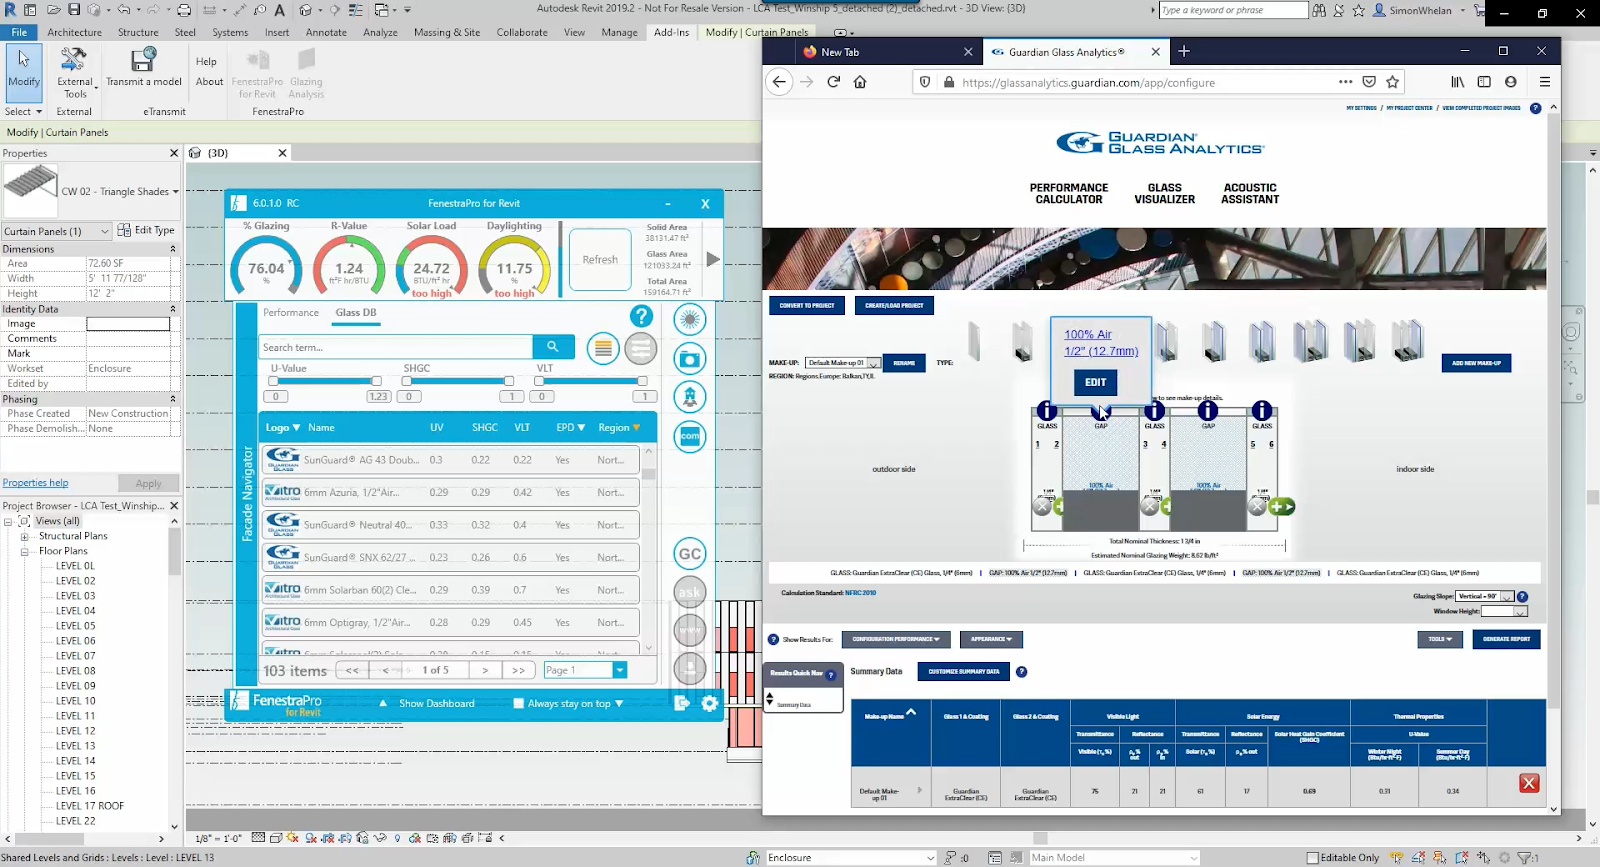
3. Under Tools, select Export to Guardian Glass for BIM.
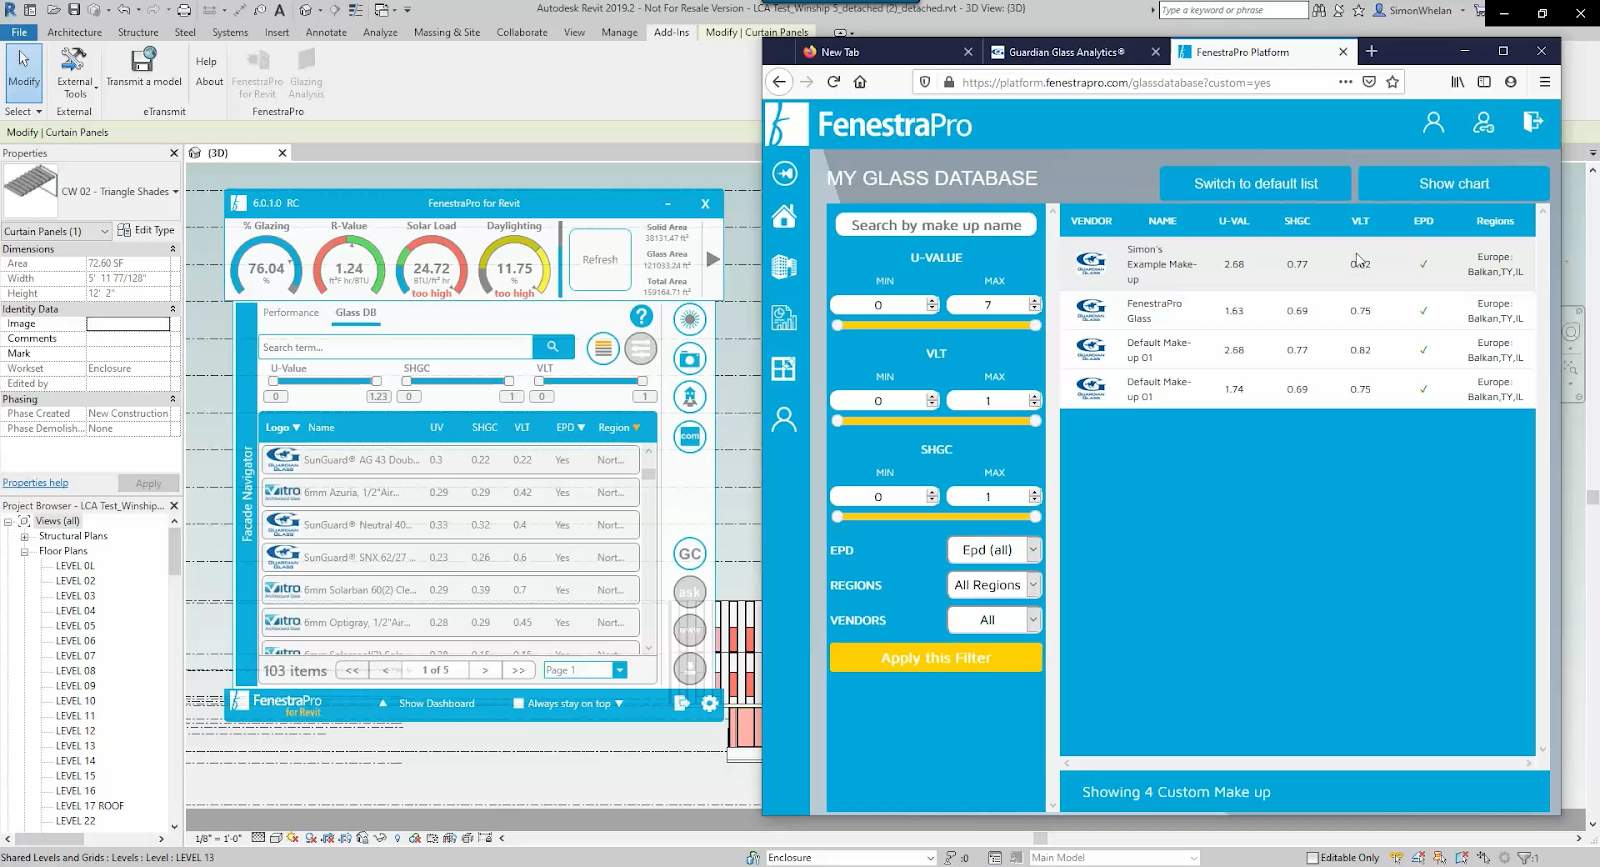
4. This will open your account on the FenestraPro Platform. Under the Glass Database, you will see your Custom Glass types.
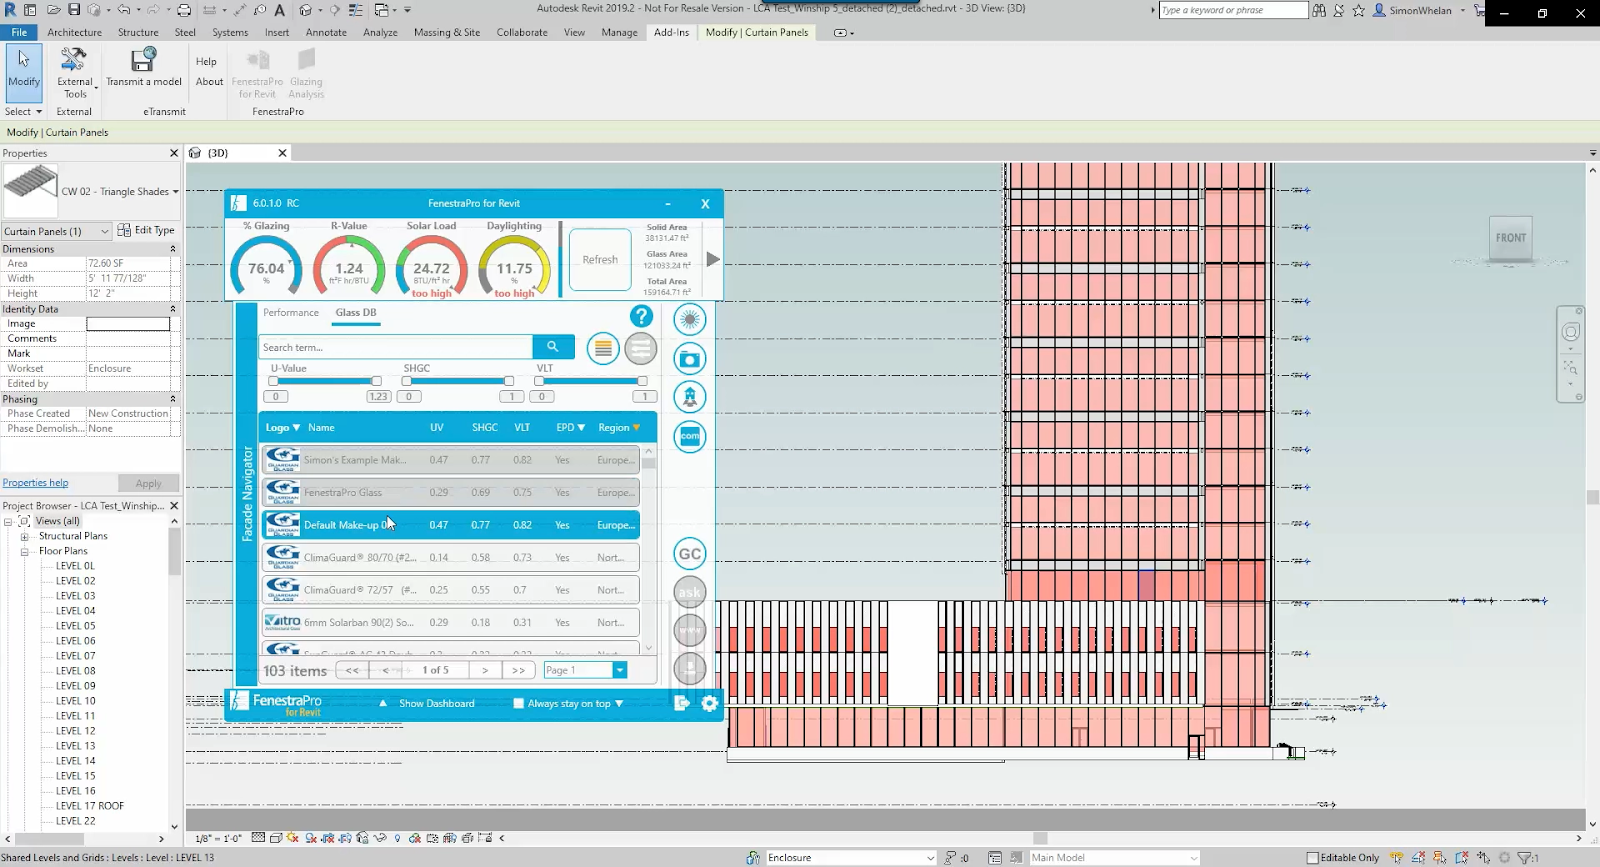
5. Refresh FenestraPro for Revit. Your new custom IGU will appear in your Glass DB, available to apply to any Revit family.
Want a demo on how to create a custom glass unit in Revit? Register for a 30-day free trial of FenestraPro and an architect will walk you through this process step-by-step.